Powered By Blogger
Showing posts with label DIY. Show all posts

11.30.2016

Attracting Backyard Birds and DIY Winter Feeders


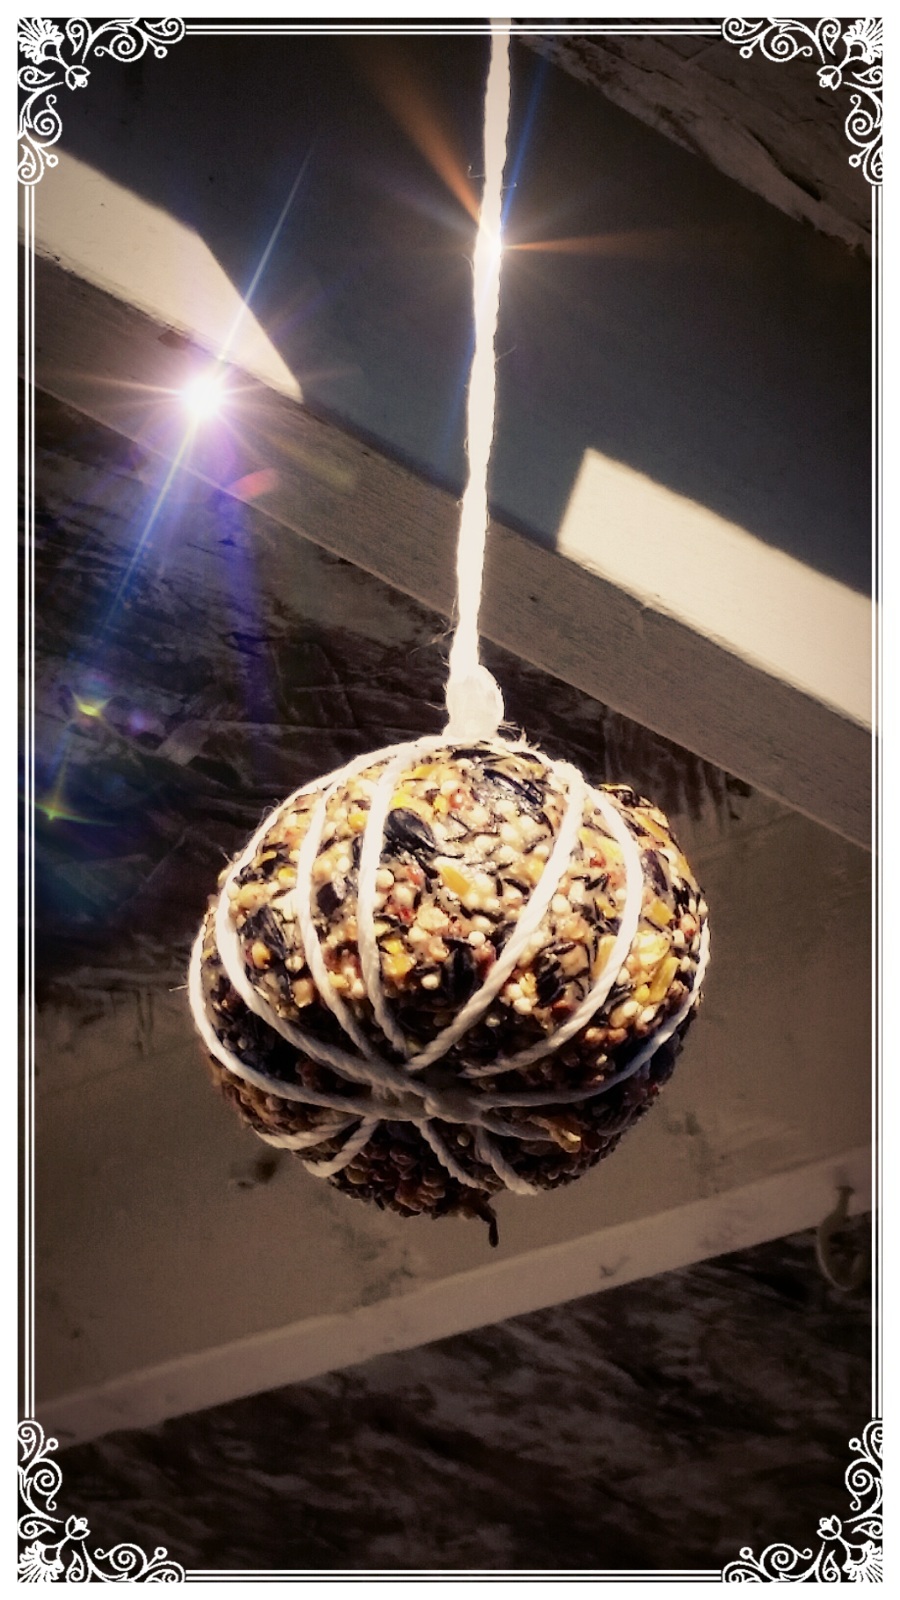
Bird feeders for backyard birds are easy to make and an economical solution to help birds stay fed this winter. Birds such as Purple and Gold Finches are attracted to Thistle Seed. Nuthatches and Woodpeckers are attracted to sunflower seeds and peanut butter, among other things. Those two ingredients are sure to make them frequent flyers. My seed mix includes an economical seed that sparrows and chickadees eat together in small flocks, which has grains such as corn, millet, and sunflower seeds mixed in. I added thistle seed, then mixed in a good amount of peanut butter to make it all stick together. For the ball feeder below, I just rolled the seed mix into a ball by hand, then took twine and wrapped it around several times with tight knots, and added a string to hook it to my porch hook. The long feeder is 1/2 of a wrapping paper tube covered in peanut butter with a spatula, then rolled in the seed mix. A toilet paper roll will also work. The hanger is twine that I strung through the top by carefully punching holes with scissors. Bamboo sticks were popped through the feeder the same way to make perches. Ribbons can be tied to make them more attractive, but I chose to save those for feeders that will last a long time. Over time these feeders will deteriorate from rain, snow, and cold, but since they cost so little to make, they can be thrown away and replaced!


- Photo from birdfeedersnmore.com

-Photo from oakmossed.wordpress.com


10.18.2016

Photography Realism Project


My photography realism project, "Urban Decay":


The concept of finding beauty in our crumbling infrastructures. These photos were taken at a public park, due to a sudden fascination. Peeling paint, rusted metal, and plants growing out of old cracked concrete have an elegance about them. 

Prints, coffee mugs, mousepads, magnets, and coasters available at my Deviant Art Shop {link}

Clocks available at my Zazzle Shop {link}


9.01.2016

Animating With Drawings


Today was exploration with various experiments making .GIF animation files from my drawings and photos while loving this cooler weather and several quiet days. Instead of laying in a hammock however, I have been doing trial and error with freeware and file converting. While trying to learn the ropes that so many others do, I have discovered that I am not very tech savvy with embedding HTML or dealing with shockwave/flash files. Making .GIF animations out of my drawings and photos was a load of fun once I got a feel for it though. Very thrilling to see what they may turn into once looped together- like dripping paint down a canvas. Whatever the paint chooses to do, it will do. The nice thing about a computer is you can always delete it- unlike on a canvas with paint or colored pencils. Sometimes my web and graphic design mistakes as well as my lack of formal education of either are a big win I've decided!

-Small decorative icons and grass in picture courtesy of FotoRus

The possibilities are endless really.
My obsession with making several copies of the same drawing once I scan it and making each a slightly different hue just to play with it is even more of a curiosity to me now. I make my color palettes through Picasa already and have plenty on hand to loop together if I get the urge...I also found out during this search for freeware photo/video editors and design programs that not all photo "stickers" are absolutely horrible! Please note my surrealistic rendition of them above on my snapshot of the GIF files on Tumblr to prove it! 

Please visit for more GIF images. I have been keeping them there like my personal online scrapbook.
.......................................................................


3.30.2016

Family Crafts


Turning souvenirs from a day trip into window prisms and necklaces for my daughter was a fun way to make more family memories, as well as a learning experience.


 "Ideas are to literature what light is to painting"- Paul Bourget


1.26.2016

DIY Birdfeeder Ideas

Old juices bottles are great for upcycling projects. Pictured is my lastest birdfeeder that I made from recycled bottles.


How To Make Your Own

Take sharp scissors to make the feeder holes and tiny holes near the bottom to squeeze a perch through by carefully puncturing the plastic with the sharp ends.  My perches are made of chopsticks, but many found objects will work.  Next, make holes in the caps to fit a heavy duty twine through, and tie in a knot so it doesn't slide through.  String beads or shells if you like.  The outside clear plastic was painted with diluted outdoor acrylic paint.  Layers of black, blue, and purple are randomly painted in sections, then a large brush is used to scratch and blend them to give it a unique look.  Neon green and a liner brush are used around the middle sections.  Adhesive gems are placed around both feeders. To fill with bird seed, simply unscrew both caps, fill with seed and screw back on.  Hang from a hook or a tree branch about 6 feet from the ground!


9.29.2015

Organic Garden and Harvest


 I carved out a relatively small space in my yard to make an organic garden, armed with a chicken wire fence to keep animals out. Succession planting was something I wanted to try this year, and will do it again for sure. Feeding my family healthy organic vegetables everyday was a huge part of our summer. Going out to the garden to see what we could pick for dinner was a fun activity. My children learned a lot about how to take care of plants, and were great helpers. We have been very thankful for our food we have been growing for ourselves. It is a wonderful feeling as a parent to know that the food you are feeding your loved ones is completely free from harmful chemicals as much as possible, and in this case, free from GMO's also.


Once the cabbages had a turn, then Okra and beans were planted in their place for a late harvest. Zucchini I found out, doesn't do well in days straight of rain, but we got a few to eat and share early in the season before they were too saturated to continue. The fall harvest will hopefully include a few carrots I planted out of direct sunlight, and I am picking the few tomatoes I can before the first frost. Unfortunately, a 4 foot fence with a gate doesn't keep the 2 legged kind of animals out of your garden, so we only had a few vines of tomatoes to work with. The rest of the vines were cut at the roots by thieves in the night multiple times. Sigh. 


Eggplants have become a weekly vegetable dish because of our organic garden giving us so many daily. We will miss our fresh green beans and cherry tomatoes, but making a family sized garden is for sure the way to go. With more experience with pests and plant diseases under my belt, next year the plan is to have plenty leftover for the winter! 


2.18.2015

Winterbound: Adventures in Upcycling and Thrifty Crafts

Upcycling

Upcycling is just like recycling, but a little more fun.  You are helping minimize human impact to the environment by keeping garbage out of oceans and landfills, but you are instead keeping it and making a new use out of it.  I am a daily coffee drinker, and always have an abundance of leftover coffee cans. I have used some of the supply of different shapes and sizes for canisters and cooking utensil holders for my kitchen. By taking the labels off, then using sharpies and brush pens for designs and new labels, they have been repurposed:


Old bike rims can be recycled into scrap metal- or they can be used for a variety of decorations or given a functional use, such as a trelis. This website has some ideas:


Pictured below, I have spray painted old bike rims and hung them to my shed using a power drill:


Thrifty Crafts

Kitchen cabinets can be upgraded cheaply and easily.  Plain white cabinets can become
modernized with a stencil and sharpie!  You could also use paint, and either buy a stencil or make the stencil yourself. A symmetrical design drawn onto cardboard, then cut out with an exacto knife works well.  Contact paper and an exacto knife can also bring new life to boring surfaces, or cover stained or scratched ones. It's a cheap and simple way to resurface cabinets or tables.


Bamboo placemats, or felt squares, with ribbon woven throughout can hold pencils or markers in place.  Old purse straps can be used in place of ribbon.  Any material that will fit through the slats and is able to bend easily while being strong will work fine.  Paracord, buttons, and beads from children's craft supplies or from your own stash are sewn on to hold together a compact and beautiful organizer for art supplies. They are great for artists who use mixed mediums. There are various blogs out there with tons of examples and little artists love these as a gift.  Here are mine for colored pencils and sharpies:


2.04.2014

Turning Trash into Art

I have begun making necklaces again and sewing some new purses and wristlets from old jeans. I am also making a mobile, and a Willow Tree sculpture. Taking found items, or pieces of broken things to make something new for a decoration for your home or for yourself is a creative and entertaining way to recycle. Pieces of old necklaces with new strands of beads and buttons, and holding it all together with wire from a broken lampshade is how I made the necklace below. 
Please excuse my novice photography!


12.17.2013

Christmas Decorations


Decorations off the main tree, a non-traditional tree this year. Was made with found items, inexpensive, and hand- made ornaments. Lots of fun decorating it with my kids. They love that they have their own "mini" tree too.


-"Winter Solstice Tree"